伪类和伪元素
伪类和伪元素
提示
先看看 css 有哪些伪类和伪元素,伪类用于当已有元素处于的某个状态时,为其添加对应的样式,这个状态是根据用户行为而动态变化的,比如:hover。伪元素用于创建一些不在文档树中的元素,并为其添加样式,也就是虚拟存在的,比如::before。
伪类
| 类型 | 说明 |
|---|---|
| :link | 链接伪类,未访问链接 |
| :visited | 链接伪类,已访问链接 |
| :active | 链接伪类,鼠标点击时 |
| :hover | 链接伪类,鼠标悬停时 |
| :not | CSS 否定伪类 |
| :focus | 获得焦点的元素 |
| :focus-within | 表示一个元素获得焦点或该元素的后代元素获得焦点 |
| :placeholder-shown | 在 <input> 或 <textarea> 元素显示 placeholder text 时生效 |
| :first-child | 所属父元素的首个子元素 |
| :nth-child | 所属父元素的第 N 个子元素 |
| :nth-last-child | 所属父元素的第 N 个子元素,从最后一个计算 |
| :nth-of-type | 针对具有一组兄弟节点的标签, 用 n 来筛选出在一组兄弟节点的位置 |
| :first-of-type | 表示一组兄弟元素中其类型的第一个元素 |
| :last-of-type | 父元素的所有子元素中的最后一个选定元素 |
| :empty | 没有子元素的元素。子元素只可以是元素节点或文本(包括空格) |
| :target | 代表一个唯一的页面元素(目标元素),其 id 与当前 URL 片段匹配 |
| :checked | 表示任何处于选中状态的 radio |
| :enabled | 表示任何被启用的(enabled)元素。如果一个元素能够被激活(如选择、点击或接受文本输入),或者能够获取焦点,则该元素是启用的 |
| :disable | 表示任何被禁用的元素 |
伪元素
| 类型 | 说明 |
|---|---|
| ::after | 用来创建一个伪元素,作为已选中元素的最后一个子元素 |
| ::before | 创建一个伪元素,其将成为匹配选中的元素的第一个子元素 |
| ::first-letter | 选中某 block-level element(块级元素)第一行的第一个字母,并且文字所处的行之前没有其他内容(如图片和内联的表格) |
| ::first-line | 只能在块容器中,所以,::first-line 伪元素只能在一个 display 值为 block, inline-block, table-cell 或者 table-caption 中有用。在其他的类型中,::first-line 是不起作用的 |
| ::selection | 应用于文档中被用户高亮的部分(比如使用鼠标或其他选择设备选中的部分) |
| ::backdrop | 在任何处于全屏模式的元素下的即刻渲染的盒子(并且在所有其他在堆中的层级更低的元素之上) |
伪类用法举例
由于上面介绍过有哪些伪类了,这里不再赘述,直接看这些伪类能在我们实际的开发中做些什么
链接伪类
估计用的最多的也就是:hover鼠标悬停的伪类了,可以实现鼠标悬停盒子阴影,控制动画的暂停播放等效果 注:在 CSS 定义中,a:hover 必须位于 a:link 和 a:visited 之后,这样才能生效 这里看一个简单的示例:
<div class="link">
  <a href="https://juejin.im/post/5eba61b85188256d6e21322c"
    >不起眼的css box-shadow 属性</a
  >
</div>
/* 未访问的链接 */
.link a:link {
  color: #ff0000;
}
/* 已访问的链接 */
.link a:visited {
  color: #00ff00;
}
/* 当有鼠标悬停在链接上 */
.link a:hover {
  color: #ff00ff;
}
/* 被选择的链接 */
.link a:active {
  color: #0000ff;
}
否定伪类:not
使用::notCSS 否定伪类:not(X),是以一个简单的以选择器 X 为参数的功能性标记函数。它匹配不符合参数选择器 X 描述的元素
:not()伪类不能被嵌套,这意味着:not(:not(...))是无效的。- 可以利用这个伪类写一个完全没有用处的选择器。例如,
:not(*)匹配任何非元素的元素,因此,这个规则将永远不会被应用。 - 可以利用这个伪类提高规则的优先级。例如,
#foo:not(#bar)和#foo会匹配相同的元素,但是前者的优先级更高。 :not(.foo)将匹配任何非 .foo 的元素,包括<html>和<body>。- 这个选择器只会应用在一个元素上,无法用它来排除所有父元素。比如, body :not(table) a 依旧会应用到表格元素
<table>内部的<a>上, 因为<tr>将会被:not(table)这部分选择器匹配。 实际开发中处理特殊边框,第一种,通过border-right: none``border-left: none``border-bottom: none``border-top: none进行特殊边框的处理,第二种就是通过:not()否定伪类来实现
<ul>
  <li>右边框</li>
  <li>右边框</li>
  <li>右边框</li>
  <li>右边框</li>
</ul>
ul {
  margin: 50px auto;
  width: 400px;
  height: 48px;
  font-size: 24px;
  display: flex;
  flex-direction: row;
  list-style: none;
}

ul li {
  width: 100px;
  line-height: 48px;
  text-align: center;
}

ul li:not(:last-child) {
  border-right: 1px solid #666;
}
效果如下: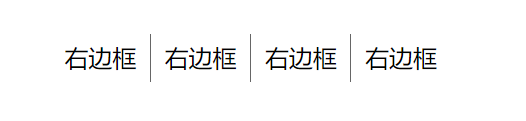
:focus 焦点伪类
CSS 伪类 :focus 表示获得焦点的元素(如表单输入)。当用户点击或触摸元素或通过键盘的 “tab” 键选择它时会被触发。
<input type="text" /> <textarea cols="8" rows="3"></textarea>
input:focus,
textarea:focus {
  color: red;
}
:focus-within
:focus-within 是一个 CSS 伪类 ,表示一个元素获得焦点,或,该元素的后代元素获得焦点。换句话说,元素自身或者它的某个后代匹配 :focus 伪类。(shadow DOM 树中的后代也包括在内)
<div>
  <input type="text" />
</div>
div:focus-within {
  background-color: lightpink;
  height: 60px;
  width: 220px;
  padding: 10px;
}

input {
  /* 去除聚焦后的边框 */
  outline: none;
  /* 修改光标的颜色 */
  caret-color: red;
}
效果如下:
:placeholder-shown
:placeholder-shownCSS 伪类 在 <input> 或 <textarea> 元素显示 placeholder text 时生效
<input type="text" placeholder="placeholder text" />
input {
  border: 2px solid black;
  padding: 3px;
}

input:placeholder-shown {
  border-color: limegreen;
}
效果如下:
:first-child
:first-child CSS pseudo-class 表示在一组兄弟元素中的第一个元素
<p>这个段落是其父元素(body)的首个子元素</p>
<p>这个段落不是其父元素的首个子元素</p>
p:first-child {
  background-color: lightseagreen;
  border-bottom: 1px solid #000;
}
效果如下:
:nth-child
:nth-child(an+b) 这个 CSS 伪类首先找到所有当前元素的兄弟元素,然后按照位置先后顺序从 1 开始排序,选择的结果为 CSS 伪类:nth-child 括号中表达式(an+b)匹配到的元素集合 tr:nth-child(2n+1)表示 HTML 表格中的奇数行。 tr:nth-child(odd)表示 HTML 表格中的奇数行。 tr:nth-child(2n)表示 HTML 表格中的偶数行。 tr:nth-child(even)表示 HTML 表格中的偶数行。 span:nth-child(0n+1)表示子元素中第一个且为 span 的元素,与 :first-child 选择器作用相同。 span:nth-child(1)表示父元素中子元素为第一的并且名字为 span 的标签被选中 span:nth-child(-n+3)匹配前三个子元素中的 span 元素 以上那么多,可以根据自己在实际工作中的需要进行选择,这里我们一起看一个隔行变色的示例:
<table>
  <thead>
    <tr>
      <td>分类</td>
      <td>属性</td>
      <td>描述</td>
    </tr>
  </thead>
  <tbody>
    <tr>
      <td>A类</td>
      <td>B类</td>
      <td>C类</td>
    </tr>
    <tr>
      <td>1</td>
      <td>2</td>
      <td>3</td>
    </tr>
  </tbody>
</table>
table {
  border-collapse: collapse;
}
tr,
td {
  border: 1px solid #333;
}
tbody tr:nth-child(even) {
  background-color: lightpink;
}
tbody tr:nth-child(odd) {
  background-color: lightgreen;
}
效果如下: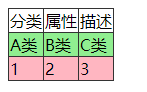
:nth-last-child
:nth-last-child() 这个 CSS 伪类 从兄弟节点中从后往前匹配处于某些位置的元素
<tbody>
  <tr>
    <td>A类</td>
    <td>B类</td>
    <td>C类</td>
  </tr>
  <tr>
    <td>1</td>
    <td>2</td>
    <td>3</td>
  </tr>
</tbody>
tbody tr:nth-last-child(2) {
  background-color: lightpink;
}
效果如下: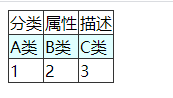
:nth-of-type
:nth-of-type() 这个 CSS 伪类是针对具有一组兄弟节点的标签, 用 n 来筛选出在一组兄弟节点的位置 语法: :nth-of-type( <nth> ) nth 值:<nth> = <an-plus-b> | even | odd
<tbody>
  <tr>
    <td>分类A</td>
    <td>属性A</td>
    <td>描述A</td>
  </tr>
  <tr>
    <td>分类B</td>
    <td>属性B</td>
    <td>描述B</td>
  </tr>
</tbody>
tbody tr:nth-of-type(2) {
  background-color: lightcyan;
}
效果如下: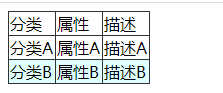
:first-of-type
CSS 伪类 :first-of-type表示一组兄弟元素中其类型的第一个元素
<p>文本段落1</p>
<p>文本段落2</p>
p:first-of-type {
  color: red;
  font-style: italic;
}
效果如下: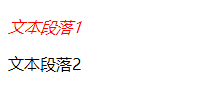
:last-of-type
:last-of-type CSS 伪类 表示了在(它父元素的)子元素列表中,最后一个给定类型的元素
<p>文本段落1</p>
<p>文本段落2</p>
p:last-of-type {
  color: aqua;
}
效果如下: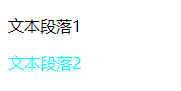
:empty
:empty CSS 伪类 代表没有子元素的元素。子元素只可以是元素节点或文本(包括空格)。注释或处理指令都不会产生影响
<div class="box"></div>
<div class="box">文本</div>
<div class="box"></div>
.box {
  background: lightcyan;
  height: 80px;
  width: 80px;
  float: left;
}

.box:empty {
  background: lightseagreen;
}
效果如下: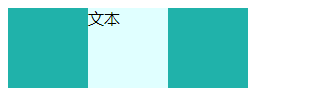
:targe
:target CSS 伪类 代表一个唯一的页面元素(目标元素),其 id 与当前 URL 片段匹配
:targe 示例 1
<ol>
  <li><a href="#p1">跳到第一段</a></li>
  <li><a href="#p2">跳到第二段</a></li>
  <li><a href="#nowhere">没有目标</a></li>
</ol>
<p id="p1">跳转段落1</p>
<p id="p2">跳转段落2</p>
p:target {
  background-color: gold;
}
/* 在目标元素中增加一个伪元素*/
p:target::before {
  font: 70% sans-serif;
  content: '\2BC8';
  color: limegreen;
  margin-right: 0.25em;
}
/*在目标元素中使用italic样式*/
p:target i {
  color: red;
}
效果如下:
:targe 示例 2
不使用任何 Javascript 代码,只使用:target 伪类创建一个弹框。该技术依赖于初始化时就隐藏在页面中的链接到指定元素的锚。一旦定位,CSS 就会更改其 display 以便显示 弹框:DEMO
<ul>
  <li><a href="#onclick1">点击#1</a></li>
  <li><a href="#onclick2">点击#2</a></li>
</ul>
<div class="lightbox" id="onclick1">
  <figure>
    <a href="#" class="close"></a>
    <div class="content">
      点击#1的内容
    </div>
  </figure>
</div>
<div class="lightbox" id="onclick2">
  <figure>
    <a href="#" class="close"></a>
    <div class="content">
      点击#2的内容
    </div>
</div>
.lightbox {
  display: none;
}
.lightbox:target {
  position: absolute;
  left: 0;
  top: 0;
  width: 100%;
  height: 100%;
  display: flex;
  align-items: center;
  justify-content: center;
}
/* 内容盒子 */
.lightbox .content {
  width: 16rem;
  position: relative;
  padding: 1.5em;
  background-color: lightpink;
}
/* 关闭按钮 */
.lightbox .close {
  position: relative;
  display: block;
}
.lightbox .close::after {
  right: -1rem;
  top: -1rem;
  width: 2rem;
  height: 2rem;
  position: absolute;
  display: flex;
  z-index: 1;
  align-items: center;
  justify-content: center;
  background-color: black;
  border-radius: 50%;
  color: white;
  content: '×';
  cursor: pointer;
}
/* 遮罩层 */
.lightbox .close::before {
  left: 0;
  top: 0;
  width: 100%;
  height: 100%;
  position: fixed;
  background-color: rgba(0, 0, 0, 0.7);
  content: '';
  cursor: default;
}
效果如下:
:checked
:checked CSS 伪类选择器表示任何处于选中状态的radio(<input type="radio">), checkbox (<input type="checkbox">) 或("select") 元素中的 option HTML 元素("option")
<div>
  <input type="radio" name="my-input" id="male" />
  <label for="male">男</label>
  <input type="radio" name="my-input" id="female" />
  <label for="female">女</label>
</div>
<div>
  <input type="checkbox" name="my-checkbox" id="opt-in" />
  <label for="opt-in">Check me!</label>
</div>
div,
select {
  margin: 8px;
}
input:checked + label {
  color: red;
}
input[type='radio']:checked {
  box-shadow: 0 0 0 3px orange;
}
input[type='checkbox']:checked {
  box-shadow: 0 0 0 3px hotpink;
}
效果如下: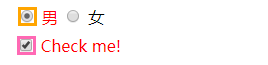
:enabled
CSS 伪类 :enabled 表示任何被启用的(enabled)元素。如果一个元素能够被激活(如选择、点击或接受文本输入),或者能够获取焦点,则该元素是启用的。元素也有一个禁用的状态(disabled state),在被禁用时,元素不能被激活或获取焦点
<form action="url_of_form">
  <label for="FirstField">用户名:</label>
  <input type="text" id="FirstField" value="用户" /><br />
</form>
input:enabled {
  color: #2b2;
}
效果如下:
:disable
:disabled CSS 伪类表示任何被禁用的元素
<form action="#">
  <label for="name">Enabled Input:</label>
  <input type="text" autofocus />
  <hr />
  <label for="name">Disabled Input:</label>
  <input type="text" disabled />
</form>
input {
  width: 60%;
  margin: 0;
  border: none;
  outline: 1px solid lightgrey;
  outline-offset: 2px;
}
input:disabled {
  background: url(data:image/png;base64,iVBORw0KGgoAAAANSUhEUgAAAAQAAAAECAYAAACp8Z5+AAAAIklEQVQIW2NkQAKrVq36zwjjgzhhYWGMYAEYB8RmROaABADeOQ8CXl/xfgAAAABJRU5ErkJggg==)
    repeat;
}
* {
  -webkit-box-sizing: border-box;
  -moz-box-sizing: border-box;
  box-sizing: border-box;
}
body {
  font: 300 16px/1.25 'Helvetica Neue', sans-serif;
  color: slategrey;
  background: cornflowerblue;
  padding: 1.5em;
}
form {
  background: whitesmoke;
  padding: 1.5em;
  max-width: 400px;
  width: 100%;
  outline: 3px solid rgba(0, 0, 0, 0.25);
}
hr {
  visibility: hidden;
}
label {
  margin-right: 3%;
  text-align: left;
  display: inline-block;
  width: 35%;
}
效果如下: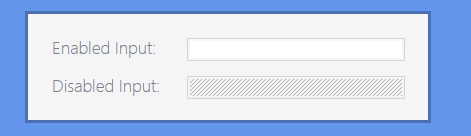
伪元素用法举例
::after
CSS 伪元素::after用来创建一个伪元素,作为已选中元素的最后一个子元素。通常会配合content属性来为该元素添加装饰内容。这个虚拟元素默认是行内元素 content中可以是字符串,数字,符号,Unicode 编码,这里提供一个Unicode 编码网站 在实际开发过程中我们会经常用到 ul,li,ol 等,如果需要自定义列表序号,通过定位,浮动等进行字体图标或者图片,进行布局过于繁琐,只需要::after伪元素即可解决,下面一块看个定义列表序号示例:
<div>
  <h3>待处理</h3>
  <ul>
    <li>待办任务1</li>
    <li>待办任务2</li>
    <li>待办任务3</li>
  </ul>
</div>
<div>
  <h3>已完成</h3>
  <ul>
    <li class="completed">完成任务1</li>
    <li class="completed">完成任务2</li>
    <li class="completed">完成任务3</li>
  </ul>
</div>
ul,
li {
  padding: 0;
  margin: 0;
  list-style: none;
}

h3 {
  padding: 0;
  margin: 0;
}

div {
  float: left;
  margin-left: 20px;
}

ul {
  font-size: 20px;
  color: #323232;
}

li {
  padding: 0.3rem 0;
}

li::before {
  content: '🗹 ';
  color: aqua;
}

li.completed::before {
  content: '✔ ';
  text-decoration: none;
  color: greenyellow;
}

li.completed {
  text-decoration: line-through;
  color: #bdbdbd;
}
效果如下: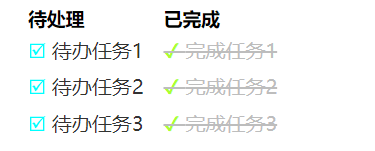
::before
CSS 中,::before 创建一个伪元素,其将成为匹配选中的元素的第一个子元素。常通过 content 属性来为一个元素添加修饰性的内容。此元素默认为行内元素
<a href="javaScript:;">嗯嗯...</a>
a {
  text-decoration: none;
}

a::before {
  content: '♥';
  font-size: 24px;
}
效果如下:
::first-letter
::first-letter会选中某 block-level element(块级元素)第一行的第一个字母,并且文字所处的行之前没有其他内容(如图片和内联的表格) font-size
原价:<span class="price">¥000</span>
.price {
  display: inline-block;
  color: red;
}
.price:first-letter {
  margin-right: 5px;
  /* <absolute-size>,绝对大小值 */
  font-size: xx-large;
  vertical-align: -2px;
}
效果如下:
::first-line
::first-line CSS pseudo-element (CSS 伪元素)在某 block-level element (块级元素)的第一行应用样式。第一行的长度取决于很多因素,包括元素宽度,文档宽度和文本的文字大小 ::first-line也能玩出不少效果,下面一块看一个第一行字母变成大写的示例:
<p>css hello world text-transform: uppercase</p>
p {
  width: 200px;
}
p::first-line {
  /* 控制文本的大小写 */
  text-transform: uppercase;
  background-color: lightgreen;
}
效果如下: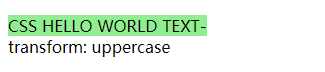
::selection
::selection CSS 伪元素应用于文档中被用户高亮的部分(比如使用鼠标或其他选择设备选中的部分 **分三种情况:**1.浏览器默认情况,2.自定义被用户选中高亮部分,3.禁用高亮选中,本质上设置了一个相同的背景色
<p>
  参禅之初,看山是山,看水是水;禅有悟时,看山不是山,看水不是水;禅中彻悟,看山仍是山,看水仍是水。
</p>
p {
  width: 400px;
}
p::selection {
  color: beige;
  background-color: lightseagreen;
}
效果如下:
参考资料: MDN